
Hello!
Following ‘Getting Started with goormIDE1: Creating a Project’, today we will learn ‘2: Layout, Build and Run’.
Now that we have a container, we need to write some code and run it.
Layout
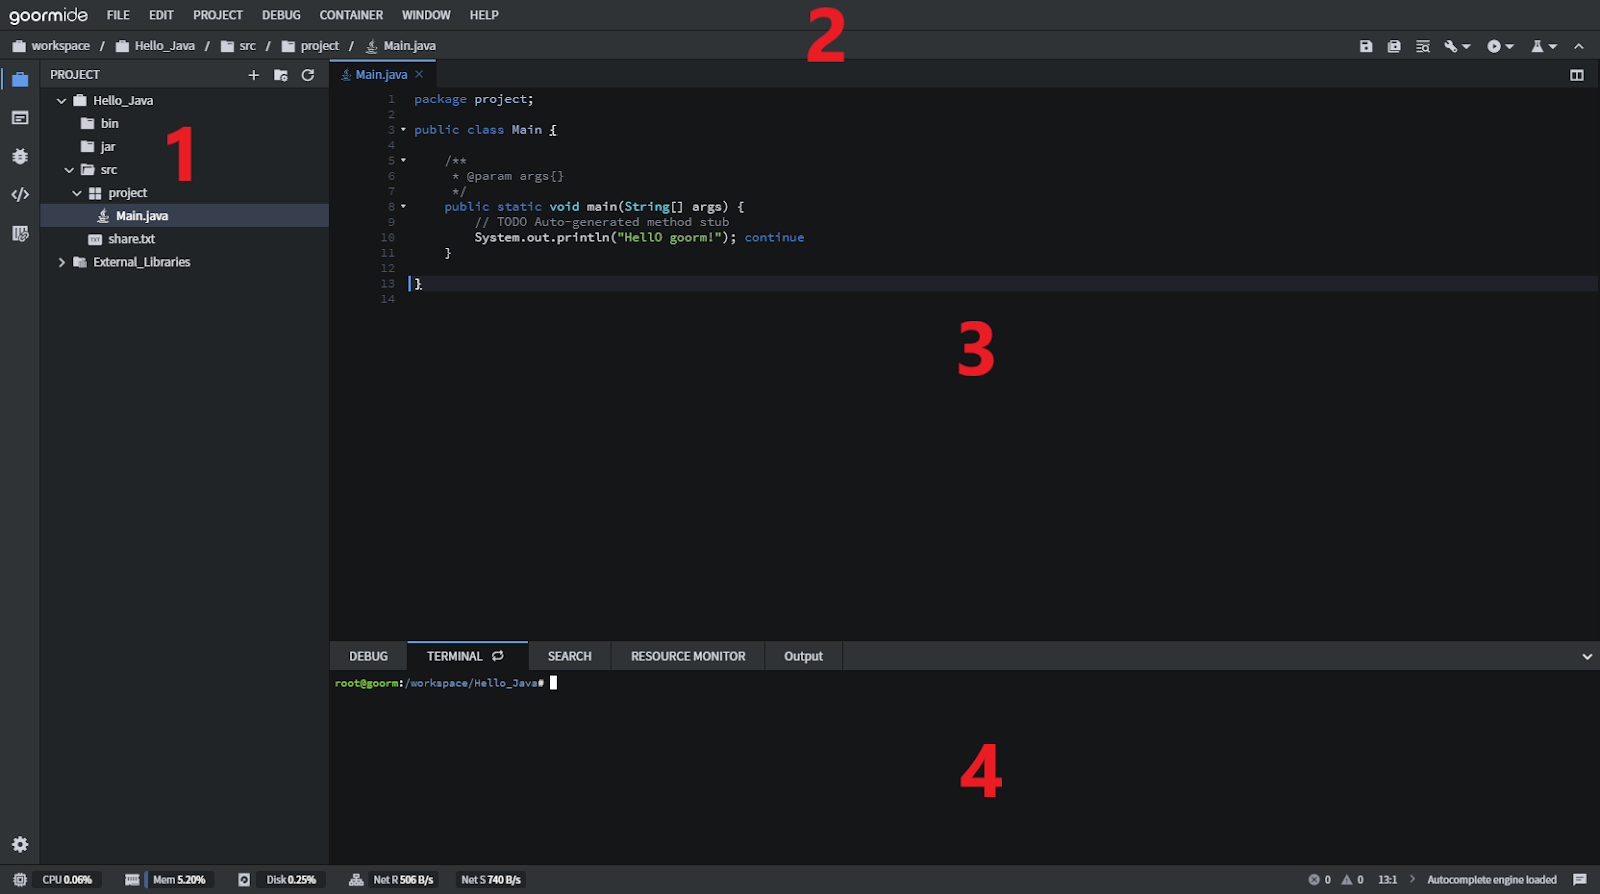
- Project explorer which manages files / folders in goormIDE.
- Main menu and main toolbar for accessing all goormIDE’s features.
- Workspace for editing.
- Bottom layout containing features related to building or running a project.
Wait!
goormIDE allows you to customize the default layout to your own development environment.
Click on the “Window” menu in area 2 and use it as needed in the submenu that appears. You can use shortcuts for more convenience.

- New Terminal Window –
Alt + Shift + T (Mac: ⌥⇧T): Create a new terminal window in your workspace. - Previous Window –
Alt + Shift + [ (Mac: ⌥⇧[): Activates the left window of the currently active window when multiple editors are open in the workspace. - Next Windows –
Alt + Shift + ] (Mac: ⌥⇧]): Activates the right window of the currently active window when multiple editors are open in the workspace. - Screen Layout : Hide or show the pane of the interface. You can adjust the pane by pressing the ‘∧∨ < >’ button or by grabbing the border and dragging.
Top Pane Show/Hide –
Alt + Shift + A (Mac: ⌥⇧A): Show or hide the top (menu / toolbar) layout.
Left Pane Show/Hide –
Alt + Shift + L (Mac: ⌥⇧L): Show or hide the left (Project Explorer) layout.
Bottom Pane Show/Hide –
Alt + Shift + B (Mac: ⌥⇧B): Show or hide the bottom layout.
Default Layout : Returns the layout configuration of goormIDE to default.
- Toggle Screen Layout –
Alt + Shift + W (Mac: ⌥⇧W): Toggles left, right and bottom layouts. Closes the currently open layout and opens a closed layout. - Split vertically –
Alt + Shift + V (Mac: ⌥⇧V): Split the workspace vertically. You can split up to 4 per workspace. - Split horizontally –
Alt + Shift + H (Mac: ⌥⇧H): Split the workspace horizontally. You can split up to 4 per workspace. - Close workspace –
Alt + C (Mac: ⌥C): Closes the current partitioned workspace. Combines two separate workspaces into one.

Default shortcuts can be changed in “Preferences” > “Shortcut”.
Writing your code
After creating a project, you can read the file list through the Project Explorer on the left. Double-clicking on the file brings up an editor window in the middle workspace where you can edit the code.
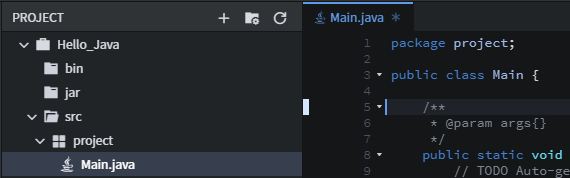
When you edit in the editor and enter the edit state, a ✱ is displayed on the right side of the editor tab.

There are three ways to save code: 1) click on the “Save” icon in the top toolbar, 2) “FILE” > “Save”, and 3) the default shortcut Ctrl + S (Mac: ⌘S).

There are three ways to save as: 1) click on the “Save As” icon in the top toolbar, 2) “FILE” > “Save As”, and 3) the default shortcut Ctrl + Shift + S (Mac: ⌘⇧S).
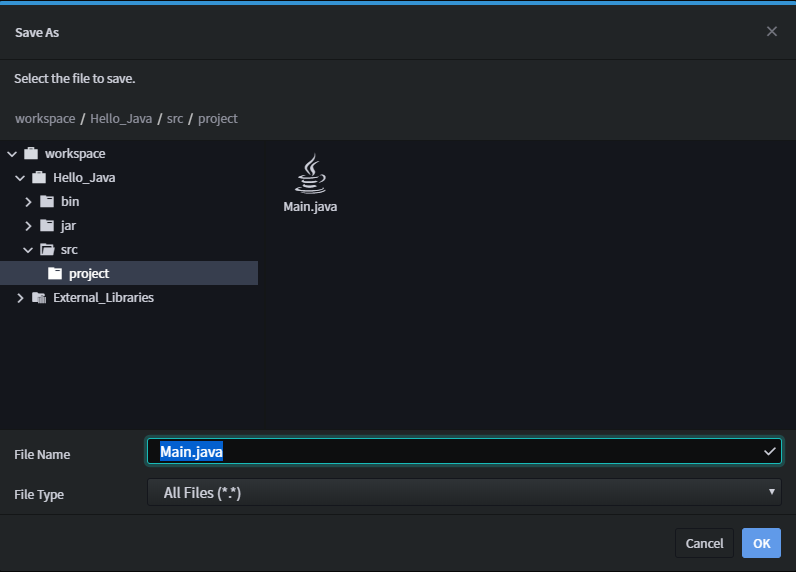
In the “Save as” pop-up window, select the location to save with the mouse or the arrow keys, enter the file name and press the “OK” button to update the project explorer and save it with the different name.
To Save all, click “FILE” > “Save All” or press the default shortcut Alt + Ctrl + S (Mac: ⌥⌘S). Save All saves all currently open editors at once.
Once saved, the ✱ mark will disappear from the editor tab. Even if you exit the goormIDE without accidentally saving the editor, you can recover the unsaved contents the next time you sign in.
Project build
Normal
Projects made with C, C ++, Go, Arduino and JAVA require building after writing code to get an executable file.

There are three ways to build a project: 1) Click the Build icon on the top toolbar, 2) “PROJECT” > “Build”, and 3) Default shortcut F5.

If there is no build command, you can add it by right clicking on the “Build” menu in the left layout “COMMAND” tab.

This is the build result of a Java project.
When you start a build, you will have a tab with the build command name in the bottom layout of the goormIDE. This tab is a build-only terminal that displays the results of running the build command. You can stop the build with the “Stop” button, and you can clear the build history with the “Clear” button. The built binary file is saved to the path specified in the configuration.
Selected file
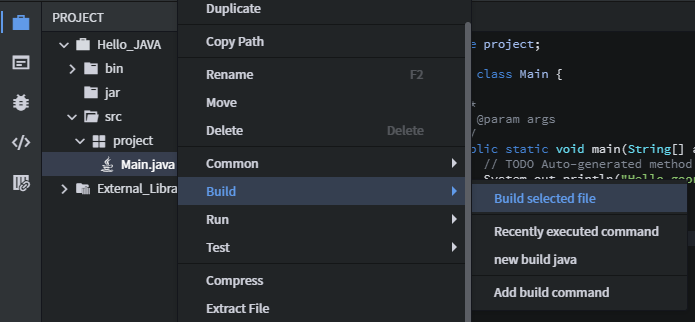
You can build a specific file (extension, file name) by selecting the file in the Project tab and right clicking and clicking “Build” > “Build selected file”.
Extension and file name of ‘Build selected file’ are as follows.
- *.c, *.cpp, *.cxx
- *.cs
- *.go
- *.java
- *.jsp
- pom.xml
- *.swift
- All other files are executed using the default shell execution method `$ <file path>`.
When you start your build, a new tab will appear at the bottom of goormIDE’s layout. This specific tab will show the results of the executed build commands. The Stop button will stop the execution, while the Clear button can clear the history.
Below is an example of a Java build result. The class file that is built will be saved in the specified path.
Run project
If your project has progressed to a certain extent, lets try running your project to see the result.
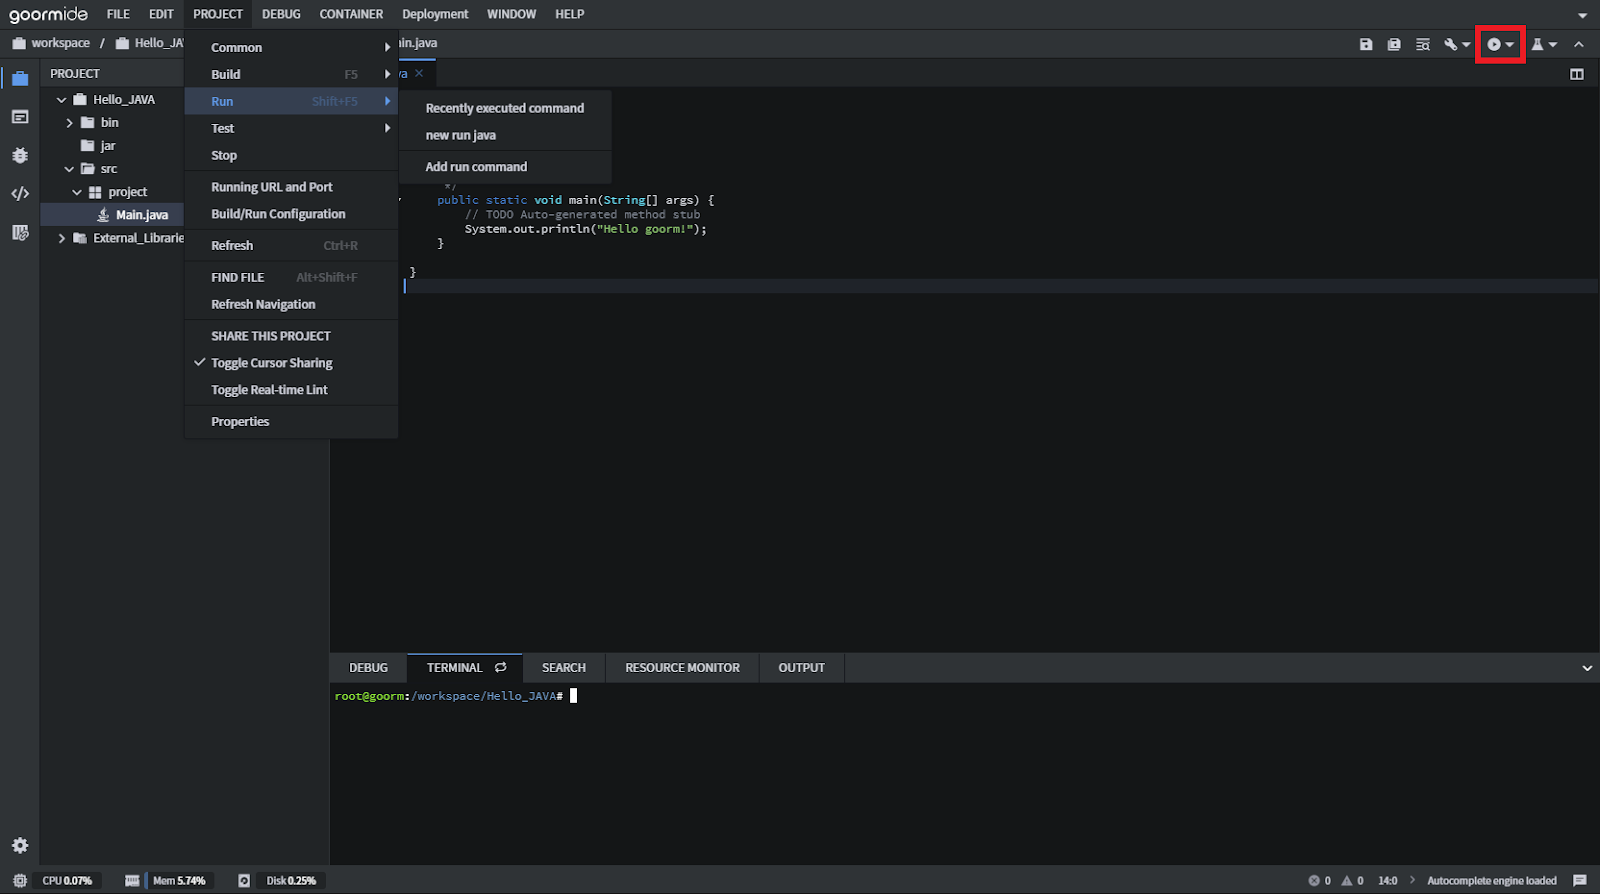
To run a project, open the project and select one of the following methods: 1) Click the “Run” icon on the top toolbar, 2) “Project” > “Run”, and 3) Default shortcut Shift + F5 (Mac: ⇧F5).

If there is no execution command, it can be added by right-clicking the “Run” menu on the left ‘COMMAND’ tab.
Basic commands can be added for each language and framework.
Basic Run commands are included for Python, Django, Flask, Jupyter Notebook, PyQ4, Python Tkinter, Nodejs, C, C++, Go PHP, Java, Java Swing, JavaFx, Java AWT, Jsp, Spring(war), jar, Ruby, Sinatra, Swift, C#, C# WinForm, .Net, and R.
You can execute Recently Executed Commands by clicking on the icon in the toolbar, or selecting it on the submenu in “Project” > “Run”.
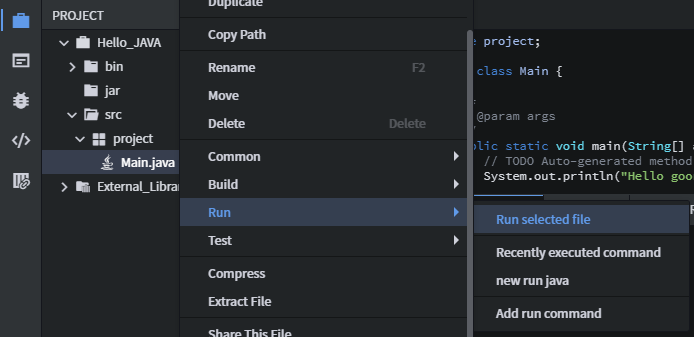
Also, you can run a specific file (with a selected file extension) by right-clicking it on the project browser and selecting “Run” > “Run selected file”.
The list of file extensions and file names that can be “Run selected file” is listed below.
- *.c, *.cpp, *.cxx
- *.cs
- *.go
- *.js
- *.php
- *.py
- *.sh
- *.R
- *.java
- *.jsp
- *.rb
- *.swift
Other files can be run by using the default shell run method, $ <file path>.

When running languages like C, C++, Java, Python and Ruby, a separate tab will appear below in goormIDE’s bottom layout. This tab is your Execution-Only terminal and will show the results of your code. The “Clear” button will clear you execution command history. The “Stop” button will close your program. In this terminal, you can see the output of your results or give input values.
Before running projects that needs a web server like PHP, JSP, or Node.js, you must register your domain address. In the next article, we’ll learn how to do it. We’ll also learn how to set up the URL and run it as a web service!